Start here when installing Solin for the first time or preparing a new computer.
Download and Install
Download Solin from the official website and choose the installer for the computer being used. The main installers support Windows 10 or later and macOS 13 or later.
01
Download the installer
Open the Solin download page and get the recommended installer for your system.
02
Install Solin
Run the downloaded file and follow the setup prompts.
03
Keep it updated
When a new version is available, update before the meeting whenever possible. On a new computer, download Solin again instead of reusing an old installer.
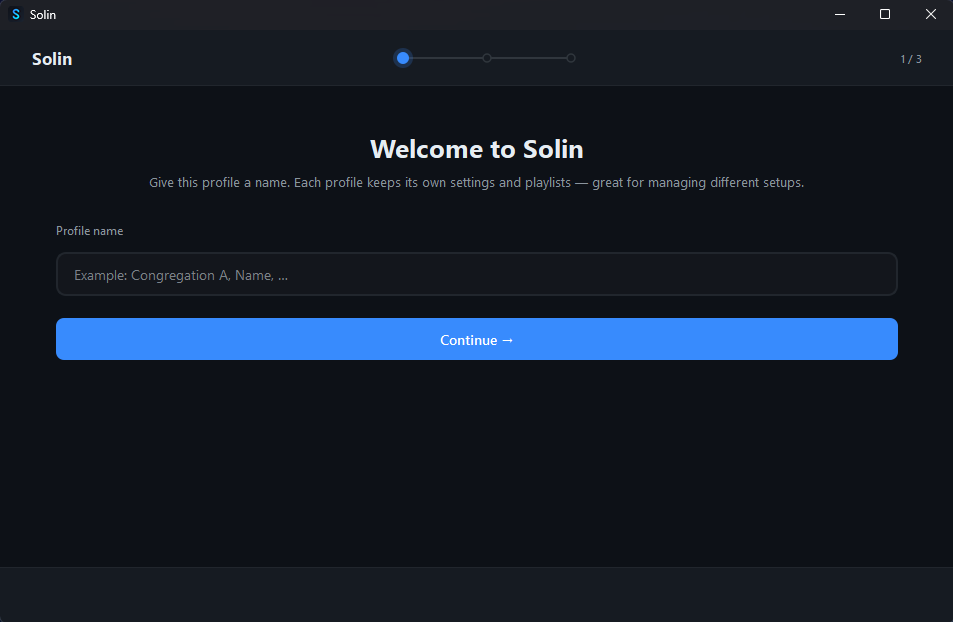
The first time Solin opens, it asks for a profile. Use a name that clearly identifies the congregation or setup, then choose the interface language and the content language used for songs and meeting media.
01
Name the profile
Choose a simple name, such as the congregation name, room name, or the group that will use that setup.
02
Choose the languages
Select the language for Solin's interface and the language used for downloaded media content.
03
Start using Solin
Finish the setup and Solin will open with that profile selected.
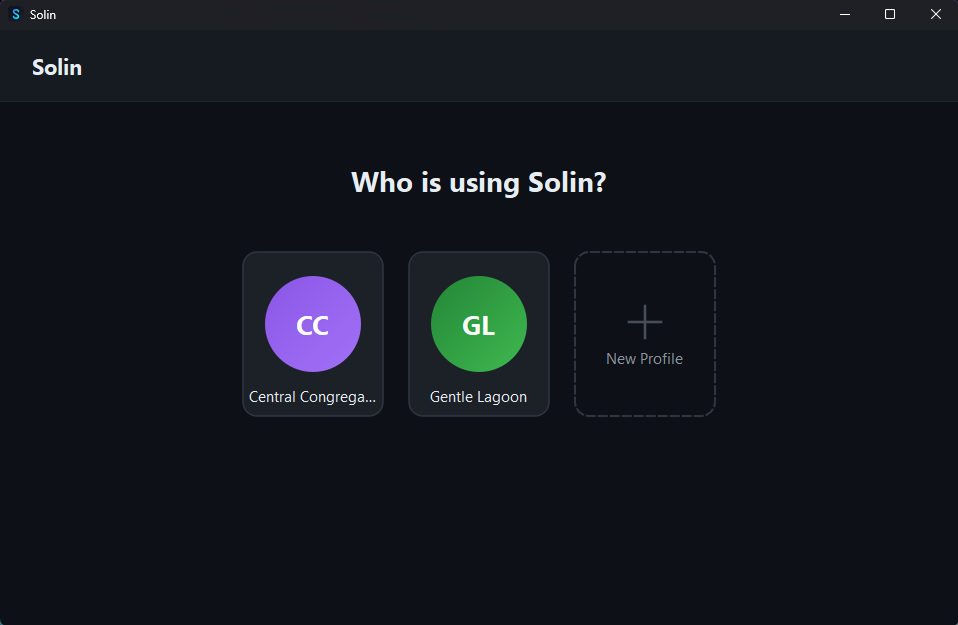
First use: create a profile and choose the initial settings.With multiple profiles, choose who is using Solin before opening the app.
02
OBS Studio Integration
Let Solin switch OBS scenes automatically when visual media is projected, then return to the regular camera scene when the projection stops.
What Solin Controls
Solin does one simple job in OBS: it asks OBS to change scenes at the right moment.
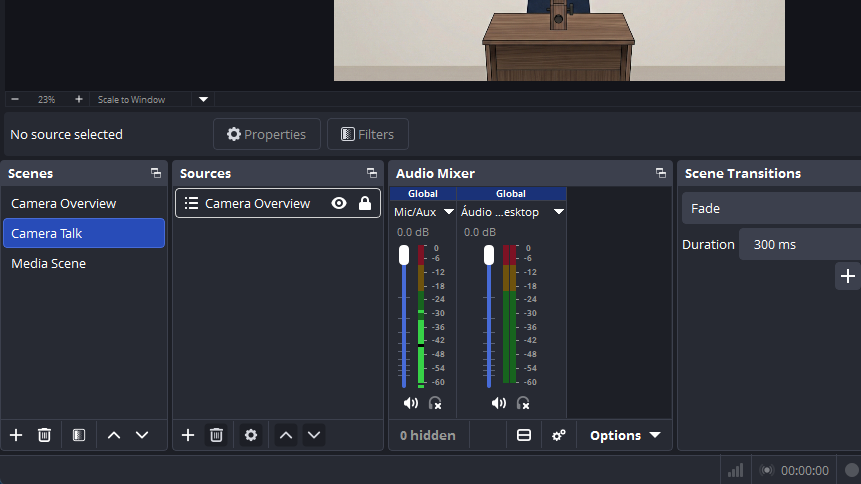
Think of OBS as the video table. One scene shows the camera or the usual meeting view. Another scene shows the Solin projection screen. When Solin starts showing a song, image, or video, OBS can move to the media scene automatically.
01
Default scene
The normal OBS scene used when no media is being projected, usually the camera showing the lectern.
02
Media scene
The OBS scene that captures the screen where Solin shows songs, images, and videos.
03
Automatic switch
When visual media starts, Solin switches OBS to the media scene. When it stops, Solin returns OBS to the previous scene or to the default scene.
Create the OBS Scenes
Create at least two scenes in OBS: one for the normal view and one for Solin's projected media. Clear names help a lot later, for example Camera and Solin Media.
Tip: keep the media scene simple. If it only needs to show Solin's projection, one monitor-capture source pointing to the secondary monitor is usually enough.
01
Create the normal scene
In OBS, add a scene for the usual view. Add the same camera source the congregation uses for the lectern.
02
Create the media scene
Add another scene for Solin media. Add a monitor capture source and choose the secondary monitor where Solin projects songs, images, and videos.
03
Test the capture
Project a simple image or song in Solin and look at the OBS preview. The media scene should show the projected content clearly.
Recommended structure: one regular scene and one scene that captures Solin's projection screen.
Connect OBS Studio to Solin
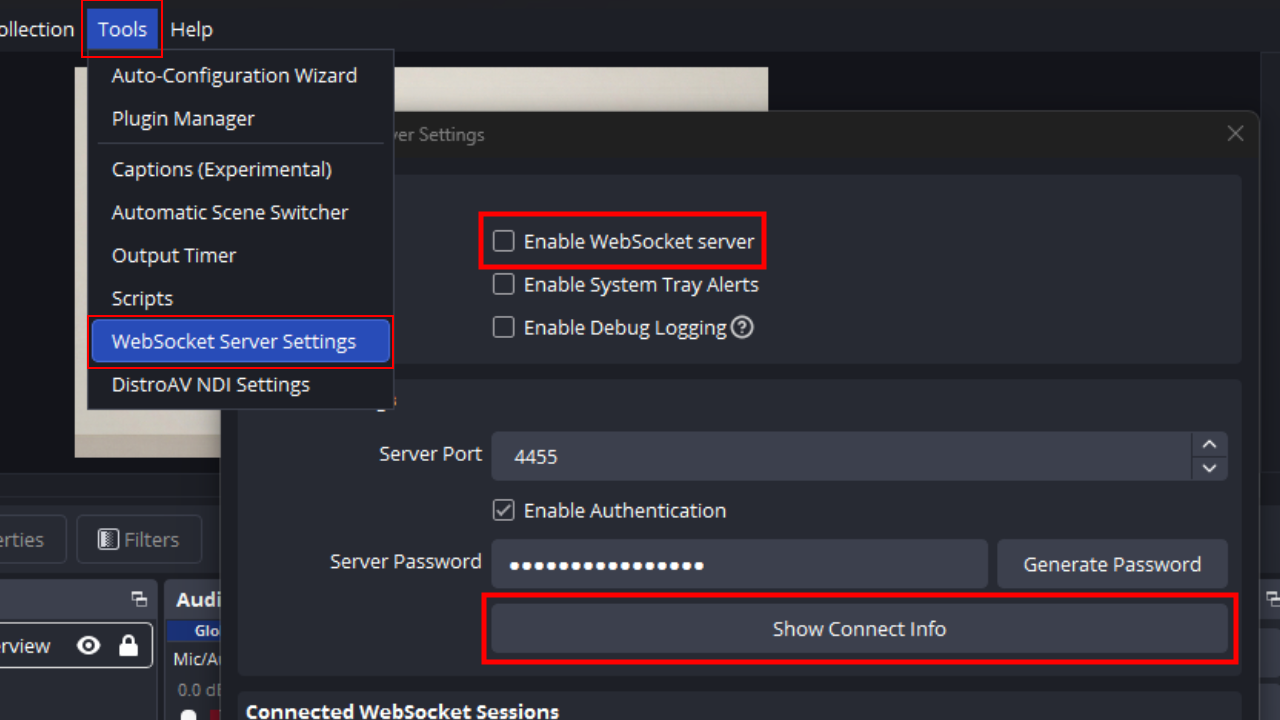
Now prepare OBS so Solin and the meeting app can use it. WebSocket is the connection Solin uses to ask OBS to change scenes. In recent OBS Studio versions it is already included, so you normally only need to turn it on.
If your OBS does not show this menu, update OBS Studio first and try again.
01
Open the WebSocket settings
In OBS, go to Tools > WebSocket Server Settings.
02
Enable the server
Turn on Enable WebSocket server. Keep the default port 4455 unless your setup already uses another port.
03
Confirm the password
Leave authentication enabled and keep the password available for Solin. Use Show connection information if you need to confirm the port or copy the password.
04
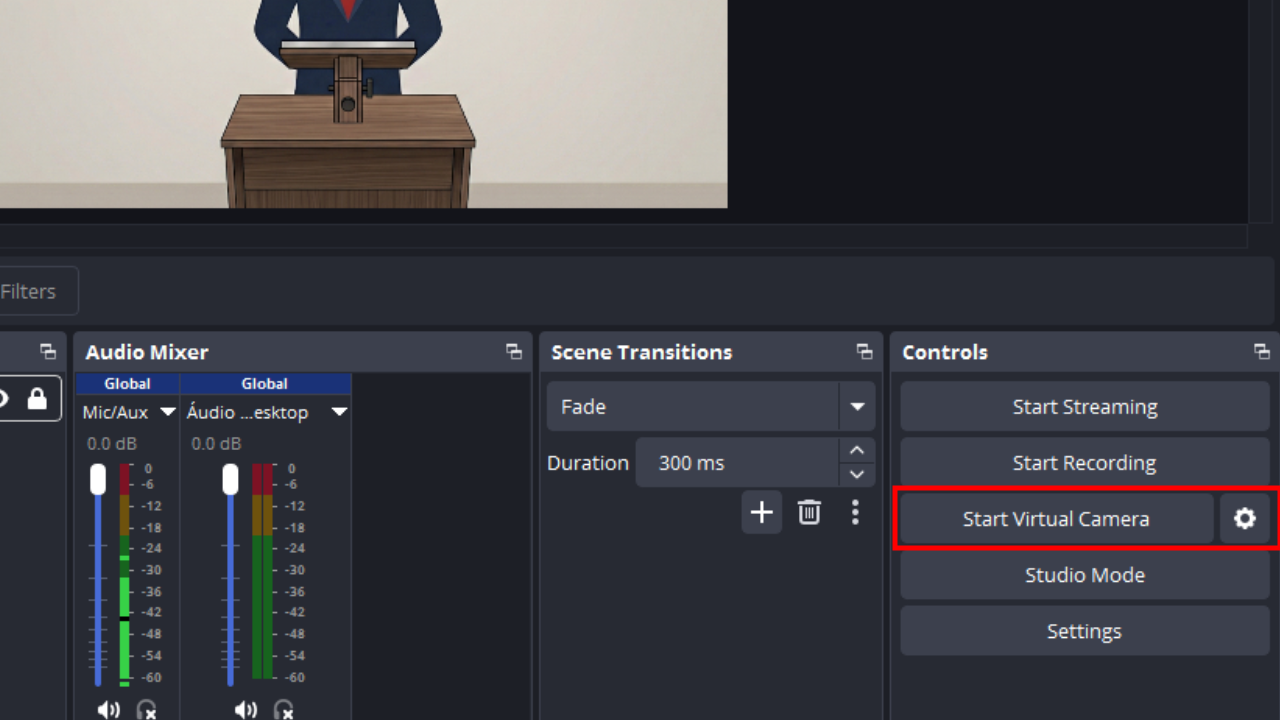
Start the virtual camera
If the meeting app will use OBS as the video source, click Start Virtual Camera in OBS and choose OBS Virtual Camera in Zoom Meetings.
Start the OBS Virtual Camera when Zoom Meetings will use OBS as the camera source.
Connect Solin to OBS
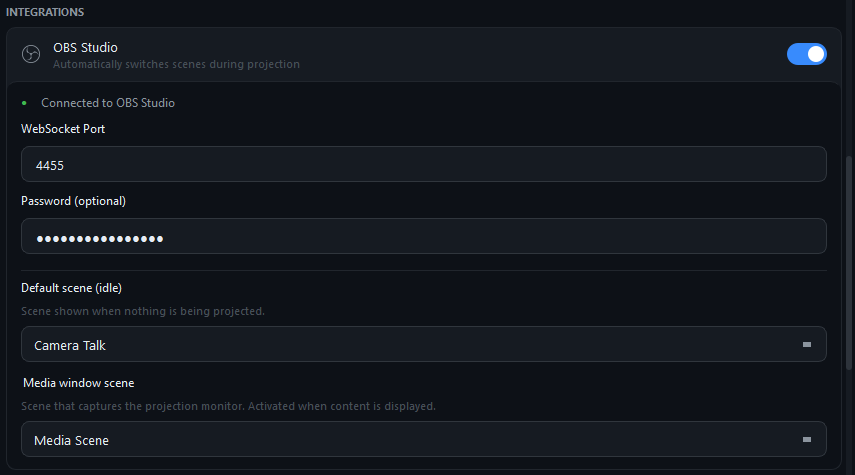
After OBS is ready, connect Solin using the same port and password. When the connection works, Solin can read the OBS scene list and you can choose exactly which scenes should be used.
01
Open Solin settings
In Solin, open Settings and find the OBS Studio integration.
02
Enable the integration
Turn on the option to automatically switch OBS scenes during projection.
03
Enter the port and password
Use the OBS WebSocket port, usually 4455, and the same password shown in OBS.
04
Choose the two scenes
Select the default scene for the normal view and the media window scene that captures Solin's projection monitor.
05
Run a quick test
Project a song, image, or video in Solin. OBS should switch to the media scene, then return when the projection stops.
In Solin, choose the default OBS scene and the scene used for projected media.
Use the OBS Program Stream with NDI
NDI lets Solin receive the video that OBS is already producing. It can be useful as an alternative to OBS Virtual Camera, for local-network video, or for more advanced setups.
The setup is simple: install DistroAV and the NDI 6 Runtime, restart OBS, turn on the DistroAV Main Output, then let Solin find that source.
Download DistroAV 6.2.1 from the DistroAV release page. On Windows, use distroav-6.2.1-windows-x64-Installer.exe. On macOS, use distroav-6.2.1-macos-universal.pkg.
Close OBS first, run the DistroAV installer for your system, and finish the installation.
02
Install the NDI 6 Runtime
Run the NDI 6 Runtime installer for Windows or macOS.
03
Open OBS again
Open OBS so the DistroAV menu appears. On macOS, restart the computer once if the menu still does not appear.
04
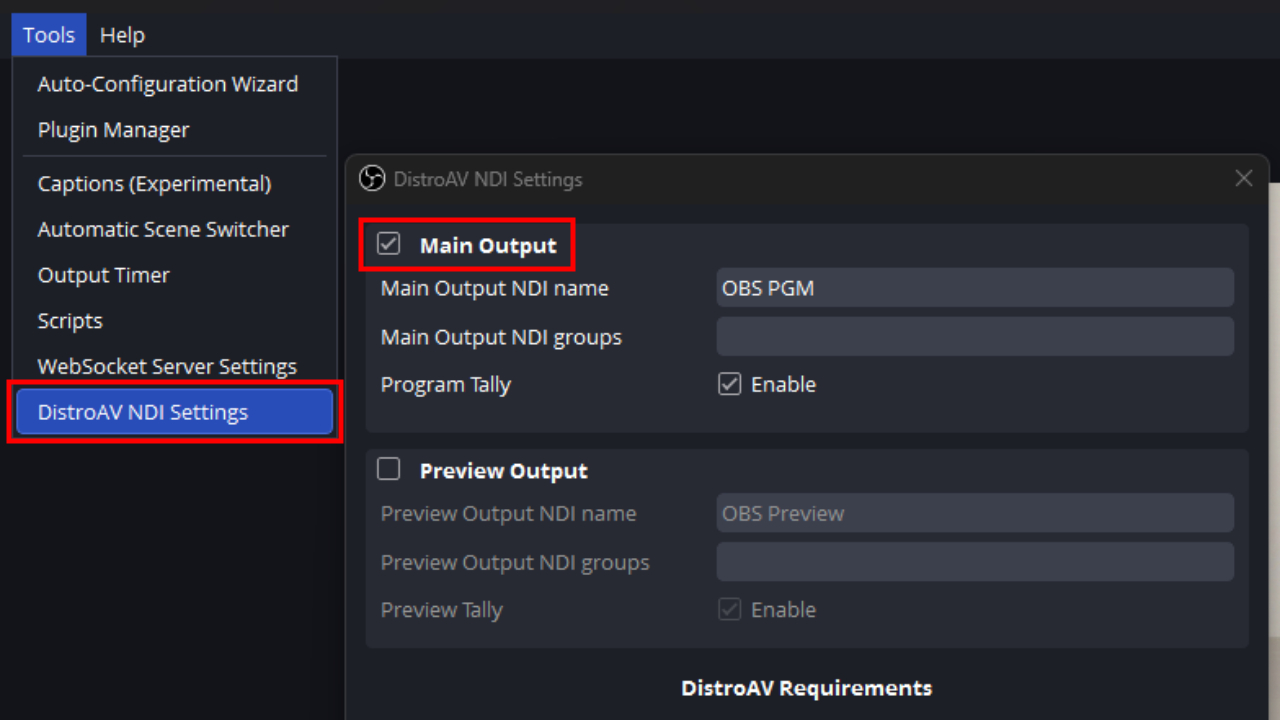
Enable the NDI Main Output
In OBS, go to Tools > NDI Output Settings and enable Main Output. This sends the OBS program view through NDI.
05
Find the source in Solin
In Solin, open Settings > OBS Studio, turn on Program stream (NDI), click Find sources, and select the source shown by OBS.
06
Use Show Stream
After the source is selected, Solin shows the Show Stream button with the OBS scene controls. Click it when you want to project the current OBS program feed.
OBS sends its main output through DistroAV/NDI. Solin finds that source and can project it with Show Stream.
Audio for Zoom or Other Meeting Apps
OBS scene switching controls the video view. Audio is a separate choice. Use the path that is easiest to test and most reliable for the congregation.
One option is to share the computer audio in Zoom when sharing the screen. Another option is to use a virtual mixer to combine the hall microphone and Solin media into one virtual microphone. Examples include MIXLINE on Windows and BlackHole on macOS. If there is already a stable audio setup, it can continue being used.
01
Choose the simplest reliable path
Use Zoom's computer-audio sharing, a virtual mixer, or an existing setup. The best option is the one that remote participants hear clearly.
02
Test audio before the meeting
Play a short media file, speak into the hall microphone, and confirm remote participants hear both at a comfortable volume.
03
Zoom Meetings Integration
Let Solin start and stop Zoom screen sharing by itself when media is projected.
Automatic Screen Sharing
This setup teaches Solin two things: which Zoom shortcut starts/stops screen sharing, and where to click inside Zoom's sharing window.
After that, the workflow becomes automatic. When Solin starts playing media, Zoom shares the target you chose. When the media stops, Solin tells Zoom to stop sharing.
01
What Solin sends
Solin sends Zoom's own share shortcut. It does not replace Zoom; it simply presses the same shortcut you would press by hand.
02
What Solin clicks
Solin clicks one saved spot in Zoom's Share window, such as the card for Screen 2.
03
When it runs
Automatic sharing runs when Solin is showing visual media. To trigger it, a Solin media window must be displayed.
Set the Zoom Share Hotkey
In Zoom, choose one global keyboard shortcut that starts/stops screen sharing. Then enter that same shortcut in Solin under Auto Screen Share > Share hotkey.
01
Create the shortcut in Zoom
Open Zoom's keyboard shortcut settings and set the global shortcut for starting/stopping screen sharing.
02
Enter it in Solin
Open Solin settings, turn on Auto Screen Share, click Share hotkey, and press the same shortcut.
03
If Solin cannot record it
Close Zoom completely, including the icon near the system clock. Right-click the Zoom icon and choose Exit. With Zoom fully closed, return to Solin and configure the shortcut again.
Set the Click Position
Now tell Solin where to click after Zoom opens the Share window. This is the step that lets Solin choose the right screen automatically.
01
Open the Zoom sharing window
Open Zoom, join or start the meeting, click Share, and leave the sharing window open.
02
Start the picker in Solin
Go back to Solin settings. Under Auto Screen Share, find Click Position and click Configure.
03
Click the target in Zoom
Move the mouse to the Zoom sharing card you want, for example Screen 2, and click it once with the left mouse button. Solin saves that spot.
04
Test with media
Play a short item in Solin and confirm Zoom starts sharing the chosen target by itself.
Fully Online Meetings
For fully online meetings, you will usually share Solin's media window instead of a secondary screen. For a cleaner result, adjust Zoom's screen-capture mode before the meeting.
01
Open Zoom sharing settings
In Zoom, open Settings > Share Screen and click Advanced near the bottom of the screen.
02
Choose the safer capture mode
Under Screen capture mode, choose Secure share with window filtering.
Use It During the Meeting
Once the hotkey and click position are saved, join the meeting in Zoom and use Solin normally.
When an image or video starts, Solin opens Zoom sharing and clicks the saved target. When the media ends or projection stops, Solin sends the same Zoom shortcut again to stop sharing.
01
Check before the meeting
Confirm Auto Screen Share is turned on in Solin.
02
Play media normally
Start the media in Solin. Zoom should begin sharing without anyone choosing the screen by hand.
03
Stop media normally
When you stop projecting, Solin stops Zoom screen sharing with the same shortcut.